Our daughter called and asked us if we would make a Barbie House for her daughter.
This got us thinking. Let's make a Barbie House for each of the girls.
We started with 1" X 12" pine boards. 3 were 8' foot long and 1 was 4' long.
As you know, I am NOT a power tool girl, yet. That is on my to do list for the summer.
Learn how to use power tools and not lose a finger, or hand.
Enter, my assistant in all things wood.
We my assistant made a square box. Put in dividers for the rooms and put on the roof.
Pretty easy, for my assistant.
Maybe, just maybe, I'm the assistant.............hmmm.
Next, start the painting and decorating. My favorite part!
I LOVE to paint, my house. My son tells people our rooms used to be a foot wider, but I've painted so much that the rooms are now smaller.
This might be true.
Because of my love for painting my rooms every few years, I have a huge supply of paint. I'm talking 15-20 cans of left over paint.
This is a good thing when making a Barbie House.
I had picked up this really pretty, brighter than the sun, pink. I'm telling you it did not look that bright in the store. Imagine my horror as I started to paint, thinking it was barbie pink. I'm telling you, I started to sweat.
I had to fix this, but didn't have time to go out and find the right pink.
So, I poured it in an ice cream pail and started adding cream paint to it.
It worked. Thank you Jesus!
I got my composure and moved on.......
This is the point in the blog where I tell you about my epic fail. I had this brilliant crazy idea to use wrapping paper as wallpaper. Great idea in my head, not such a great idea on the walls.
If I were to do it again, I would only attach it in the corners, instead of slathering Mod Podge all over the back of it. It wrinkles. Yep, like old pantyhose after a night at the club, wrinkles.
I pushed on, leaning from my mistake and hoping that my granddaughters would over look my boo boo.
I used a stencil sponge to make the polka dot look in the lavender room.
I used mirrored butterflies, with sticky backs for the pink room.
I also had some white foam stars with sticky backs, so I attached them to the wall in the striped room.
For the rooms downstairs, I took craft paper and put it behind squares to look like pictures hanging on the walls. In the room on the right, you can see I added a butterfly to the middle.
The floors are contact paper that looks like wood. I cannot tell you how easy that was to work with. I'm talking a "4 year old could do it, easy"! It's the peel and stick type so you can pick it up and move it and it does not lose the stickiness. It's kind of like working with post it notes.
Who came up with this idea? They are brilliant I tell you, brilliant.
Where is the other Barbie House you ask.
Our daughter, Tiffany, my Side Kick Blogging Partner on this here blog, took it home and worked her magic.
If you don't have a painting addiction like I do, you could just go to Lowe's or Home Depot, like Tiffany did. She bought those little paint samples in a jar, and they mixed all the colors she wanted.
I don't want to say she was like a kid in a candy store, or her mother in a paint store, but...........she was.
Here is Barbie's new living room.
That adorable picture on the wall is made from a frame in the dollar section at Target.
She also took craft paper and a sticker to make a picture.
They are the perfect size for Barbie.
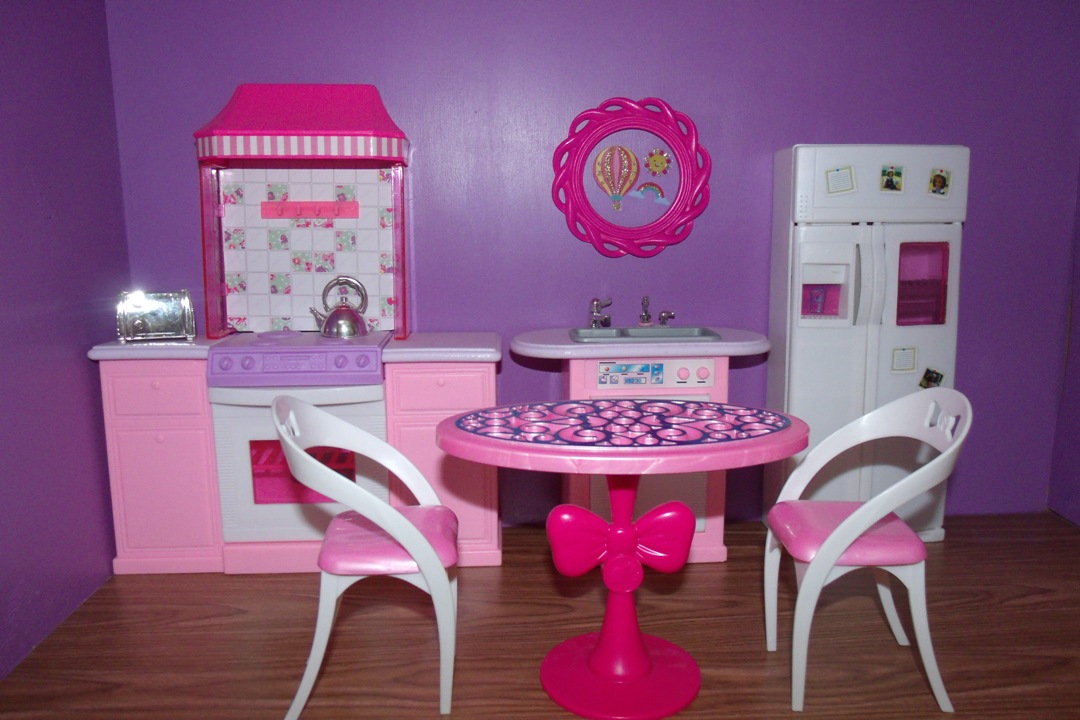
Barbie's Kitchen.
Barbie's laundry room.
I love how she used the stickers that look like laundry hanging on the line.
Seriously, what will they think of next?
Last, but not least, Barbie's attic.
I love how Tiffany's house turned out. It is so modern, bright and sunny. Exactly what little girls love!
This is a great example of how you can take the exact same piece and make it look completely different?
Our granddaughters are loving their new Barbie Houses.
My daughter-in-law emailed me the day after Elle got hers and said she played with hers all night.
The night Presley got hers, Tiffany woke up in the middle of night and could hear her playing in her room. When I say middle of the night, I'm talking 2:00 am! There was Presley, playing with her new Barbie House. She was too excited to sleep, which makes this grandma very happy.
Thank you so much for stopping by. It means so much to us!
Today I am going to share my most requested dinner recipe with you. Here is my version of chicken enchiladas!!
What you'll need:
2 large boneless skinless chicken breasts, cooked and cut into 1" pieces
Fajita style flour tortillas
2 cans cream of chicken soup
1 tsp garlic powder
2 tsp ground cumin
1 tsp chili powder
1 tsp ground coriander
1/2 C diced green chilies
1 C cheddar cheese
1/2 C milk
Preheat oven to 375.
In a large bowl, mix the soup, garlic powder, cumin, chili powder, coriander, and green chilies.
Put 1/3 of the mixture in a small bowl.
Add the cooked chicken, and 1/2 C cheese to the large bowl.
Add the milk to the mixture in the small bowl. Stir.
Spoon a small amount of the mixture in the large bowl down the middle of each tortilla shell, roll it up, and place in an ungreased 9x13 pan, seam side down.
Once all the tortillas are filled, pour the mixture in the small bowl over the tortillas and top with the remaining cheese.
Bake for 20 minutes.
This usually makes at least 10 enchiladas. If you don't want your enchiladas to be as full, or if you're making a smaller portion, cut the recipe in half.
I have been out of the blogging scene for a little while, taking a little break.
I was blessed with a trip to Cancun, with my Sister-in-Law, for 8 glorious days! It was a much needed trip, for both of us. Getting away from our cold, cloudy, Minnesota days and having some wonderful bonding time that we haven't had in years, was way over due.
So, I'm feeling refreshed and ready to get back to blogging and sharing some things I've been up to.
When one of the guys at work came back from a job site with a stainless steel sink, I knew exactly what I was going to do with it.
One of my girlfriends had a birthday coming up and she L.O.V.E.S. gardening. What do you give a girl that loves to garden? A potting bench of course!
I figured as long as we were making one for her, we should also make one for me.
We used treated wood because I wanted it to hold up to the "Minnesota Elements".
Once the bench was made, my assistant, aka Husband/Partner in All Things Wood, we cut out a hole for the sink and dropped it in.
The best part of this bench is it has water. Well, actually it's a hose.
All we did was use the existing hole that was already in the sink, for the faucet.
Hook the other end of the hose up to your outside spigot and waa laa! A potting bench, with water!
We did not add a drain/strainer to the sink bowls. Here's why.
When potting a plant, you spill dirt everywhere. Well, I do. I wanted to be able to take the spilled dirt and push it right through the holes back in to the bag or bucket, depending on where you keep your potting soil. It works perfectly.
I'm in love with the shelf underneath. You can keep your pots or baskets under there.
If you're like me, I have to decorate everything. I'm serious, everything! I'm pretty sure this is a sickness.
So, when you're done with potting your plants, decorate the bottom shelf so you have another pretty thing to look at in your backyard.
See what I mean......a sickness!
Now that my potting bench is complete and in my backyard, I'm hoping that these 27 degree days will stop. I'm starting to feel a great need to "Smell Dirt", as my friend Wendy, would say.
Sunshine and dirt. Yep, that's what makes me happy.
Well, okay, an occasional glass of wine makes me happy, too!
I would love your feedback on our Potting Bench. What would you change, what is your favorite part?
P.S. A special thank you to my amazing daughter, Tiffany, for picking up the slack while I took my little hiatus, and for always being my cheerleader.
Thank you so much for stopping by. It means the world to us!