Thursday, March 5, 2015

Transforming a Cardboard Box

Hi there!  I am so glad you stopped by.
I want to show you the cheapest, 
easiest way to make a pretty storage box, 
with things you already have.
Are you like me and you hate to throw out a good cardboard box?
I feel guilty every time I throw one out.
But, I have this strange obsession with things-that-hold-things.
Here is a super easy way to transform them in to storage.
Here is what you will need:
Cardboard box
Wrapping paper
Ribbon and bow
Tape
Measure your paper to go all the way around the box, 
and secure it with tape.
It's just like wrapping a present.
Finish the bottom.
Make a cut at each of the corners, down to the box.
You are going to want to "wrap" the inside, too.
Tuck the paper inside and secure with tape.
When you're done, it will look like this.
You could leave it just like this, but I wanted to dress it up a bit........
Add a piece of ribbon and a bow.  I secured mine with hot glue.
There you have it.  You can recycle and have pretty storage, too.
You could use different size boxes with coordinating paper, for even more storage.
I use mine to store candles, but you can use this for so many things. 
They are cute on a shelf, in the linen closet, under your sink.  The options are endless.
I hope you enjoyed this simple project 
and it inspires you to make those cardboard boxes 
in to something pretty and useful.
Thank you so much for stopping by!
Until next time,

Monday, February 23, 2015

Winter Centerpiece and Porch

Hi there!
Thank you so much for stopping by.
Like many of you, I'm dreaming of spring, 
but - I'm thinking it may be a while before I see it.
In the meantime, let's embrace this thing we call the season that never ends.
Here's how this centerpiece started.......
Last fall, I was preparing for Thanksgiving
 and decided that I would like to have something that I could decorate
and keep for the season, instead of one meal.
As you can see, it can be used for every season.
We have some barn wood from my husband's grandparents barn.  
I treasure this wood and the history behind it.  
I thought it would be perfect for such a project.
The wood was SO old and SO dirty.
I scrubbed it, in my laundry tub, with a brush and dawn dish soap.
We could not believe the beauty that was beneath all that grime.
I filled the box with floral foam, 
placing my battery candles in between each piece of foam.
The thing I love most about these candles, they have timers.
No need to turn them on each night. 
They magically turn on at 5:00 and turn off at 10:00.
I filled in around the candles with pine branches I got from Michael's. 
I added some pine cones,
silver snowflakes, and bulbs to imitate snowballs.
That's it.  Pretty easy.
When I want to remove my decorations from the table for meals,
I pick up the box and move it.  So easy!
Since we're talking about winter............
Here's a peek at my front porch.
If we're going to have 6 months of winter, we might as well make it pretty.
I started with this plaid blanket with bright colors and worked from there.
The lantern seemed like the perfect accent. 
The ice skates were my moms
and she so graciously passed them on to me 
when I told her I wanted them for my porch.  
Thanks, Mom, they're perfect!
I hope I've inspired you to take something and give it new life, in your decor.
Until next time,

Tuesday, February 17, 2015

The Free Cabinet Makeover

Hi there!
I am so glad you stopped by.  
Come, sit a spell, and take a look around.
I want to show you how I took a free cabinet 
and gave it some glam with a little paint and an old knob.  


Let me tell you how I landed this gem.
I was driving to lunch one day, in my car, and saw it on the side of the road.  
To my great surprise, it had a free sign on it!  
Whoa, back this car up!!
But, wait, have you ever tried to fit a cabinet in to a car............me neither.
Luckily, it was only about a half a block from my office.
I hurried back to my office and asked my boss if he would help me carry it back to the office.  
He did!
Imagine the two of us - walking down the side of the road carrying a cabinet;
me cracking up at the sight of us. 
What a trooper he was.
I was not a fan of the light green color, 
but knew how much I would love it once I painted it.
I just love how it turned out.
I used a flat black paint that I had on hand.
Sanded the edges a little, to give it a worn feeling.
And, put everything back the way I had it decorated before, 
so I could show you the before and after photos.
Here is another before picture...........
And, the after.
I added the old white ceramic knob that I had from another project.  
I love how it compliments my china cabinet.
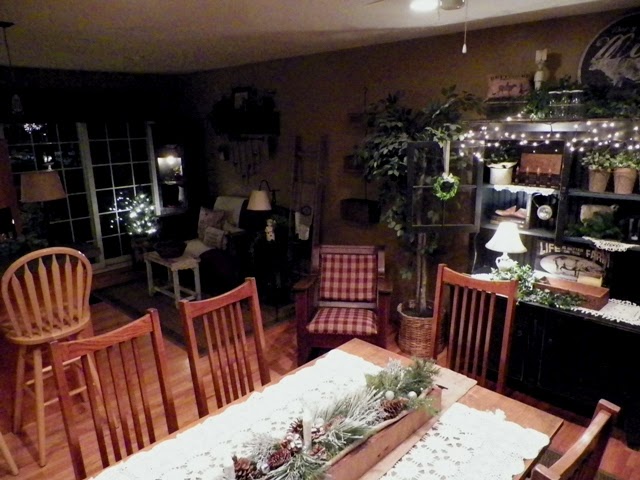
I love how it looks at night with my low lights.
Here is the china cabinet with the low lights, too.  
I just love how warm and cozy it makes my dining/room kitchen area.  
I'm all about the lighting.
One more, for fun.
Here is the before...........
And, the after.
I'm in love!
It is so fun to see how you can take something, 
add a little paint, and have a totally new creation.
Thank you so much for stopping by.  
It means so much to me.
Until next time,

Monday, February 9, 2015

Fireplace Mantel Redecorated, Again!

Hi there!
Like many of you, I redecorate my fireplace mantel, often!
I like to change it for holidays and the different seasons.
When coming up with new ideas, where do you start? 
 
Well, here is what I do.
I'm going to share a secret...........
I lay awake at night picturing in my mind what it will look like
 before I ever put one item on the mantel.  
It's a sickness I tell ya.
I start with an item, or items in this case, and decorate around them.
This time, I started with these primitive looking candle holders.
I have these old windows I've been collecting.  
The brown framed window is from an old house, 
the white framed window is from an old building in St. Paul.
I start layering and adding items as I go.  
Layering is key in my decorating.
I like to add items that are the in the same color scheme.
Differing heights give interest.  I like to call it a carnival for the eyes.
I always add a lamp.  I have this obsession with lamps and lighting.
I think it gives it a nice warmth.  You know, no one likes a dark carnival.
You can see what I mean in this picture.  Without the light on, it's just a mantel.
With the light on, it's more pleasing to look at.
Plus, when you are in the living room at night, it gives a wonderful glow.
I'm all about the glow!
I always add some type of greenery, too.  
I think it balances out the dead spaces and I like the look. 
I hope this inspires you to do something a little different.
Thank you so much for stopping by.  It means the world to me!

Monday, February 2, 2015

Valentine's Day Decor

Hi there!
I am so glad you stopped by!
I love everything about Valentine's Day decor.  The colors; red, pink, and white.
I love hearts, lace, and soft lighting.
I would decorate like a crazy woman, if I had the time.  I don't.  
So, this is my nod to Valentine's Day.


I have this cabinet that I scored on the side of the road. For free!
It is not the prettiest cabinet, but I knew it had good bones 
and would fit perfectly in the corner of my sitting area, in my kitchen.
It is the perfect piece for adding seasonal decor.  
It's large enough to be a showcase, and yet small enough,
that you don't need much to make it look good.
I will show you in another post how I painted it and made it all it could be.
But for now, here is what I did.
Notice the pine tree in my whiskey barrel.  
I admit, I had a really hard time putting all of my Christmas decor away.  
But, it is a cute way to add low lighting.
At night I turn on the lights and sit back and enjoy its loveliness.
I found this cupid picture at an antique shop a few months back, 
and knew it would be perfect here.
I added the red and white towel, along with the white pitcher, for color.
The pine sprig is to bring in the green from the pine tree, that sits in the whiskey barrel.
On the same shopping day, I found this sweet little bear, red stool, and love sign.
I didn't realize I was shopping for Valentine's Day decor.........
I have loved little wooden stools for a while now.  
They are the perfect accent to bring height to a vignette.
I love the layered look.  
I hope you enjoyed seeing my nod to Valentine's Day.
I hope that you'll come back to see how a little paint and sandpaper 
can completely change the look of a free cabinet.
Thank you so much for stopping by.  It means the world to me.
Until next time!

Monday, January 26, 2015

Lamp Shade Update

Hi there!  
I'm so glad you stopped by.
I want to show you how easy it is to update a plain lamp shade, 
with things you have around the house.
I went to Walmart to buy a cheap, white, shade.


I think it's very charming, but very plain.


I took some burlap ribbon and tied a bow......


Added a little greenery.......

and gave my plain lamp shade a little pizazz.
You could use anything you have around the house. 
 
A scarf and a flower, a belt, or beads.  The sky is the limit. 
I hope this inspires you to dress up that lamp shade you've been wondering what to do with.
Before
After!
Thank you so much for stopping by.  It means the world to me!

Turkey and Veggie Egg Bake

Hi!  We're so glad you stopped by!  I apologize for the lack of recipe updates.  To be honest, I didn't think anyone would want ...