Thursday, August 29, 2013

DIY wall decor!

Hi there!  We're so glad you stopped by!! 
It has been a while since my last post.  I haven't forgetten about you, I promise!  My family and I have been having a very busy Summer!  I have a lot of awesome things in the works that I cannot wait to share with you! 
But, in the mean time.... I wanted to post a few things that were ridiculously easy to throw together.  A while back I wrote a blog post and added it to pinterest.... About an hour later I thought "People aren't going to like these..." and I took the post down.  Well, little did I know, the photos were still up on the website and I have been getting a huge response from people!  So.... I decided I will repost them and explain (very briefly) how I made them! 
 
My daughter, Presley, turned 3 in March.  I had a rainbow/hot air balloon themed birthday party for her. 
I made the hot air balloons out of paper lanterns, Chinese to-go containers, burlap, twine, and scrapbooking embellishments.  
 
Above the food table, I hung a rainbow made out of glittery tulle.  
After the party I needed something to do with all of my leftover materials.  I had to justify spending $80 on fabric that I hung on the wall for 3 hours.  
I made a tutu for my daughter, but I still had a bunch leftover.  So I decided to hang the hot air balloons in her room and then make a wreath for her bedroom door.  
 
No sewing required.  I got a foam wreath from the dollar store, then I cut the tulle into strips, and tied them around the wreath.  You can make the tutu the same way.  I used an elastic headband to put around my daughters waist.  
 
I found a frame at a garage sale.  I spray painted it, painted a cardboard letter with acrylic paint, and put a piece of scrapbook paper on the front.  Tah-da!  DIY Wall decor... for $2!
 
I made this last Christmas.  I covered the front of (already painted) black letters with mod podge, sprinkled red glitter over the top, and shook off the excess glitter.  I had this candle ring with red beads laying around the house, so I used that for the "O".  

Monday, August 19, 2013

Easy Bridal Shower Ideas

Hi there!  We are so glad you stopped by.
A few weeks ago, Tiffany and I hosted a bridal shower, for my soon-to-be niece.
We had so much fun planning it and coming up with ideas. The day of the shower, it was just Tiffany and I for a few hours, having mom/daughter time doing what we love.  Decorating!
I wanted to share a few things with you, that we did. 
As the guests arrived, they were greeted by our "Bridal Veil" door decoration.
It is super easy to make.  
All it is, is tulle and fake flowers.  I made a bow, tied some long pieces of tulle to the bow and add the flowers. I ran a piece of wire behind all of it and attached it, with the wire, to our door knocker.
When you entered the front door, I had tulle with lights wrapped on the inside, going up the stairs.  
This my friends, was a 2 person job.....for me.
I made a bow for each post, just like I did for the front door, added the flowers and wired it to the post.
Here is a close up of the post.  
Notice my little helper on the top step, Isabelle.  By the look on her face, I would say she has a definite opinion. She's so serious!
My nephew and niece-to-be are having a country/elegant themed wedding, so I wanted to incorporate that in to the decorations.
My inspiration piece, a chalk board.
Tiffany is the artist.  She did the lettering and border, free-hand! 
 
The decorating of this basket is nothing special, just a tulle bow.  But what it is for, is what I love.  
When I host a bridal shower, I like to put thank you cards and the envelopes in a basket, tied with a bow and pass it around to all the guests, while the bride opens her presents.  Each guests addresses the envelope to themselves.
Think about the time you save for this bride.  All the envelopes are addressed and ready to go.  No searching for addresses.  The brides have enough to do right before the wedding.  This is my little way of helping her out.
When I think country, I think burlap and mason jars. 
This is also super easy.  Wrap the burlap around the jar and hot glue it.  Tie a bow around it, add some flowers, a chalk board pick, and you're done.
Tiffany also did the lettering on these little chalkboards.
The chalkboard picks have the first letter of the bride and groom's name, and in the middle, the first letter of their last name.
For the utensils, just add one more mason jar with burlap and a bow.
I saw a picture of a wedding dress cake on Pinterest and thought, "That is genius, We can do that"!  
But inside, I was thinking, can we?
Tiffany baked the cupcakes the day before the shower and the morning of the shower, we set them up and she frosted them.
Once Tiffany finished frosting it, we added pearls and a pin.
It's that easy.  
And, who doesn't like cupcakes?  Plus, there is not cutting a cake.  It's a win-win!
Here is the table all ready for the guests. Let the shower begin!
Thank you so much for stopping by.  It means the world to us.

Monday, June 24, 2013

The Nightstand and the Porch

Hi there!  We are SO glad you stopped by.
I have to tell you, I have THE smallest porch in the history of The Porch! It can be a huge challenge to decorate it.  
I suppose I should be thankful; because it is so small - it's easy to decorate, right?
As I started thinking about what I wanted to do for my summer porch, I decided on my starting piece.  
The Nightstand.
Let's just take a little look-see at what this little lady looked like before I brought out the paint brush.
I have had this piece for so long, I don't even remember where, or when, I got it. 
Look at that!  
Sponge paint hearts and all. 
I have to admit I was a sponge painting addict.  If it had a flat surface, I went after it with a sponge.
Oh, and a little fingernail polish.
This was so easy to change.  One coat of paint and new hardware.  I had the paint on hand.
The hardware I found at Menards.  
I went to Lowe's, Home Depot, Walmart and finally Menards.  
They had the best selection and the most in stock items. When I want it, I want it.  I don't want to have to order online, so this was a plus to find it in the store.
I like the clean, simple look.  
Here is what my porch looked like after taking down my winter decor.
Here is what it looks like for summer.
Side note: I'm not loving that stick wreath on the wall but I have this Momma Bird that built a nest in it before I could take it down.  She comes every spring - and builds her nest.  
I can't decide if I'm mad at her or if I'm in love with her for picking our porch to birth her babies.
Thank you so much for stopping by.  It truly means the world to us.

Friday, May 10, 2013

Party Dip

Hi there!  We're so glad you stopped by! 
With the summer rapidly approaching that means Graduation parties, BBQs, camping, and many other get-togethers that would require bringing a dish to pass.  This one is my go-to!  I can't tell you how many times people have asked me for this recipe. 
 

WHAT YOU'LL NEED: 
16oz cream cheese, softened
1 pkg dry ranch dressing mix 
2oz chopped black olives
2 jalapeno peppers, seeds removed and chopped
1 red pepper, chopped
2/3 C. cheddar cheese

In a large mixing bowl, mix all the ingredients together with an electric mixer, and serve with Wheat Thins. 


Tuesday, May 7, 2013

Spring Topiary

Hi there!  We are so glad you stopped by!
This past weekend my Best Friends and I hosted a Baby Shower, for one of the precious daughters, of said Best Friends.  
Breaking news: I love to decorate and make crafts.  So, I was in charge of making the door prizes.
Here is one of them that I made. 
A Spring Topiary.
Here is what you will need if you would like to make one, too.
Clay pot, styrofoam ball, a half styrofoam ball, moss, ribbon, flowers and a dowel.
As you see in the picture, I started with white roses.  I bought 2 bunches.  
This plan did not work out for me. 
You will hear more about that later in the post.
I started by placing the styrofoam ball on the table and pushing the dowel through the middle. 
I added hot glue to the bottom of the dowel and placed it in the clay pot. 
It fit perfectly in to the hole in the bottom of the pot.
Take the ribbon and add a dab of hot glue to the end and attach it to the bottom of the dowel.
Wrap the ribbon around the dowel moving upward, placing a dab of hot glue every now and then, just to keep it in place. 
You don't need much, just enough to keep it from coming undone.
Next, add the round styrofoam ball to the top of the dowel.  
Again, I put hot glue on the dowel, to keep the ball in place.  
A little tip on getting it directly in the middle; take the extra dowel that you have, place the ball on the table and put it in from the top.  That way you can see that you are putting it directly in the middle.
I took the moss and glued it on top of the styrofoam ball, in the clay pot.  
I have never used this kind of moss before and was so surprised at how easy it was to work with.
Now you are ready to start adding the flowers.  
Cut the flower, leaving about 3/4" of the stem.  This way you just push the stem in to the ball. 
As you can see from this picture I started with roses, but that is not what I ended up using.  
Let 's just say, I underestimated the amount of flowers, by a LOT.  
I then proceeded to remove all of the roses.  Well, there weren't that many, so this did not take long. 
I had quite a few of these other little white flowers, so I thought I was good to go.  No, not so much.
I then took all of these out!
Then I tried making some flowers out of tulle.  Then I tried paper flowers.  
Finally, I jumped in the car and drove over to Michael's. It was 7:30 at night. Michael's is 20 minutes from my house, one way. 
I still had 3 more projects to do before morning.  Can you say, "cold sweat"?
Off I went!
I found these adorable daisies and loved them more than the roses.  I ended up buying 10 stems, each with 5 flowers on them.  So, this project took 50 flowers.  
You can see in this picture how much trauma this ball went through during this project. Thank goodness it was all going to be covered up!
Keep this in mind when buying your supplies, unless you like taking a project that would take about an hour and turning it in to a 3 hour project. 
Last, tie a ribbon around the top of the "stem". 
There you have it. A super easy, (if you aren't as scatter brained as I was), Spring Topiary.
I like it so much, I may just make one for me.
Thank you so much for stopping by.  It means the world to us.

Tuesday, April 30, 2013

Making Barbie Houses

Hi there!  We are so glad you stopped by. 
We have 2 granddaughters with birthdays in March.  
Our daughter called and asked us if we would make a Barbie House for her daughter.  
This got us thinking.  Let's make a Barbie House for each of the girls. 
We started with 1" X 12" pine boards.  3 were 8' foot long and 1 was 4' long.
As you know, I am NOT a power tool girl, yet. That is on my to do list for the summer. 
Learn how to use power tools and not lose a finger, or hand. 
Enter, my assistant in all things wood.

We my assistant made a square box.  Put in dividers for the rooms and put on the roof.  
Pretty easy, for my assistant. 
 
Maybe, just maybe, I'm the assistant.............hmmm.
Next, start the painting and decorating.  My favorite part!
I LOVE to paint, my house.  My son tells people our rooms used to be a foot wider, but I've painted so much that the rooms are now smaller. 
This might be true.
Because of my love for painting my rooms every few years, I have a huge supply of paint.  I'm talking 15-20 cans of left over paint. 
This is a good thing when making a Barbie House.
I had picked up this really pretty, brighter than the sun, pink.  I'm telling you it did not look that bright in the store. Imagine my horror as I started to paint, thinking it was barbie pink. I'm telling you, I started to sweat.
I had to fix this, but didn't have time to go out and find the right pink. 
So, I poured it in an ice cream pail and started adding cream paint to it. 
It worked. Thank you Jesus!
I got my composure and moved on.......
This is the point in the blog where I tell you about my epic fail.  I had this brilliant crazy idea to use wrapping paper as wallpaper.  Great idea in my head, not such a great idea on the walls.
If I were to do it again, I would only attach it in the corners, instead of slathering Mod Podge all over the back of it. It wrinkles.  Yep, like old pantyhose after a night at the club, wrinkles.  
I pushed on, leaning from my mistake and hoping that my granddaughters would over look my boo boo.
I used a stencil sponge to make the polka dot look in the lavender room. 
I used mirrored butterflies, with sticky backs for the pink room.  
I also had some white foam stars with sticky backs, so I attached them to the wall in the striped room.
For the rooms downstairs, I took craft paper and put it behind squares to look like pictures hanging on the walls.  In the room on the right, you can see I added a butterfly to the middle. 
The floors are contact paper that looks like wood.  I cannot tell you how easy that was to work with.  I'm talking a "4 year old could do it, easy"!  It's the peel and stick type so you can pick it up and move it and it does not lose the stickiness.  It's kind of like working with post it notes. 
Who came up with this idea?  They are brilliant I tell you, brilliant.
Where is the other Barbie House you ask. 
Our daughter, Tiffany, my Side Kick Blogging Partner on this here blog, took it home and worked her magic.
If you don't have a painting addiction like I do, you could just go to Lowe's or Home Depot, like Tiffany did.  She bought those little paint samples in a jar, and they mixed all the colors she wanted.  
I don't want to say she was like a kid in a candy store, or her mother in a paint store, but...........she was.
Here is Barbie's new living room.  
That adorable picture on the wall is made from a frame in the dollar section at Target.  
She also took craft paper and a sticker to make a picture. 
They are the perfect size for Barbie.
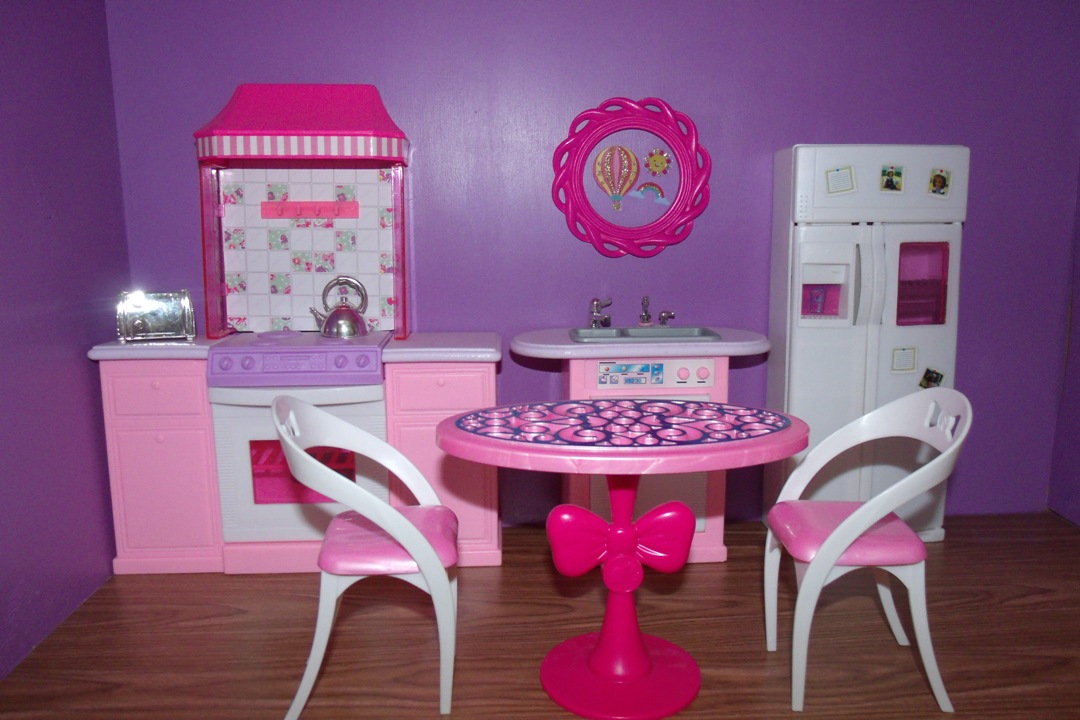
Barbie's Kitchen. 
 
Barbie's laundry room.  
I love how she used the stickers that look like laundry hanging on the line.  
Seriously, what will they think of next?
Last, but not least, Barbie's attic.  
I love how Tiffany's house turned out.  It is so modern, bright and sunny.  Exactly what little girls love!
This is a great example of how you can take the exact same piece and make it look completely different?  
Our granddaughters are loving their new Barbie Houses.  
My daughter-in-law emailed me the day after Elle got hers and said she played with hers all night.
The night Presley got hers, Tiffany woke up in the middle of night and could hear her playing in her room.  When I say middle of the night, I'm talking 2:00 am!  There was Presley, playing with her new Barbie House.  She was too excited to sleep, which makes this grandma very happy.
Thank you so much for stopping by.  It means so much to us!

Wednesday, April 17, 2013

Chicken Enchiladas

Hi there!  We're so glad you stopped by! 
Today I am going to share my most requested dinner recipe with you.  Here is my version of chicken enchiladas!! 
 
 
What you'll need: 
  2 large boneless skinless chicken breasts, cooked and cut into 1" pieces
  Fajita style flour tortillas
2 cans cream of chicken soup
1 tsp garlic powder
2 tsp ground cumin
1 tsp chili powder
1 tsp ground coriander
1/2 C diced green chilies
1 C cheddar cheese
1/2 C milk
 
Preheat oven to 375. 
 
In a large bowl, mix the soup, garlic powder, cumin, chili powder, coriander, and green chilies. 
 
Put 1/3 of the mixture in a small bowl.
 
Add the cooked chicken, and 1/2 C cheese to the large bowl. 
 
Add the milk to the mixture in the small bowl. Stir.
 
Spoon a small amount of the mixture in the large bowl down the middle of each tortilla shell, roll it up, and place in an ungreased 9x13 pan, seam side down. 
 
Once all the tortillas are filled, pour the mixture in the small bowl over the tortillas and top with the remaining cheese.  
 
Bake for 20 minutes.   
 
This usually makes at least 10 enchiladas.  If you don't want your enchiladas to be as full, or if you're making a smaller portion, cut the recipe in half.

Turkey and Veggie Egg Bake

Hi!  We're so glad you stopped by!  I apologize for the lack of recipe updates.  To be honest, I didn't think anyone would want ...